
I've been playing with my
Bake Sale fabric line again
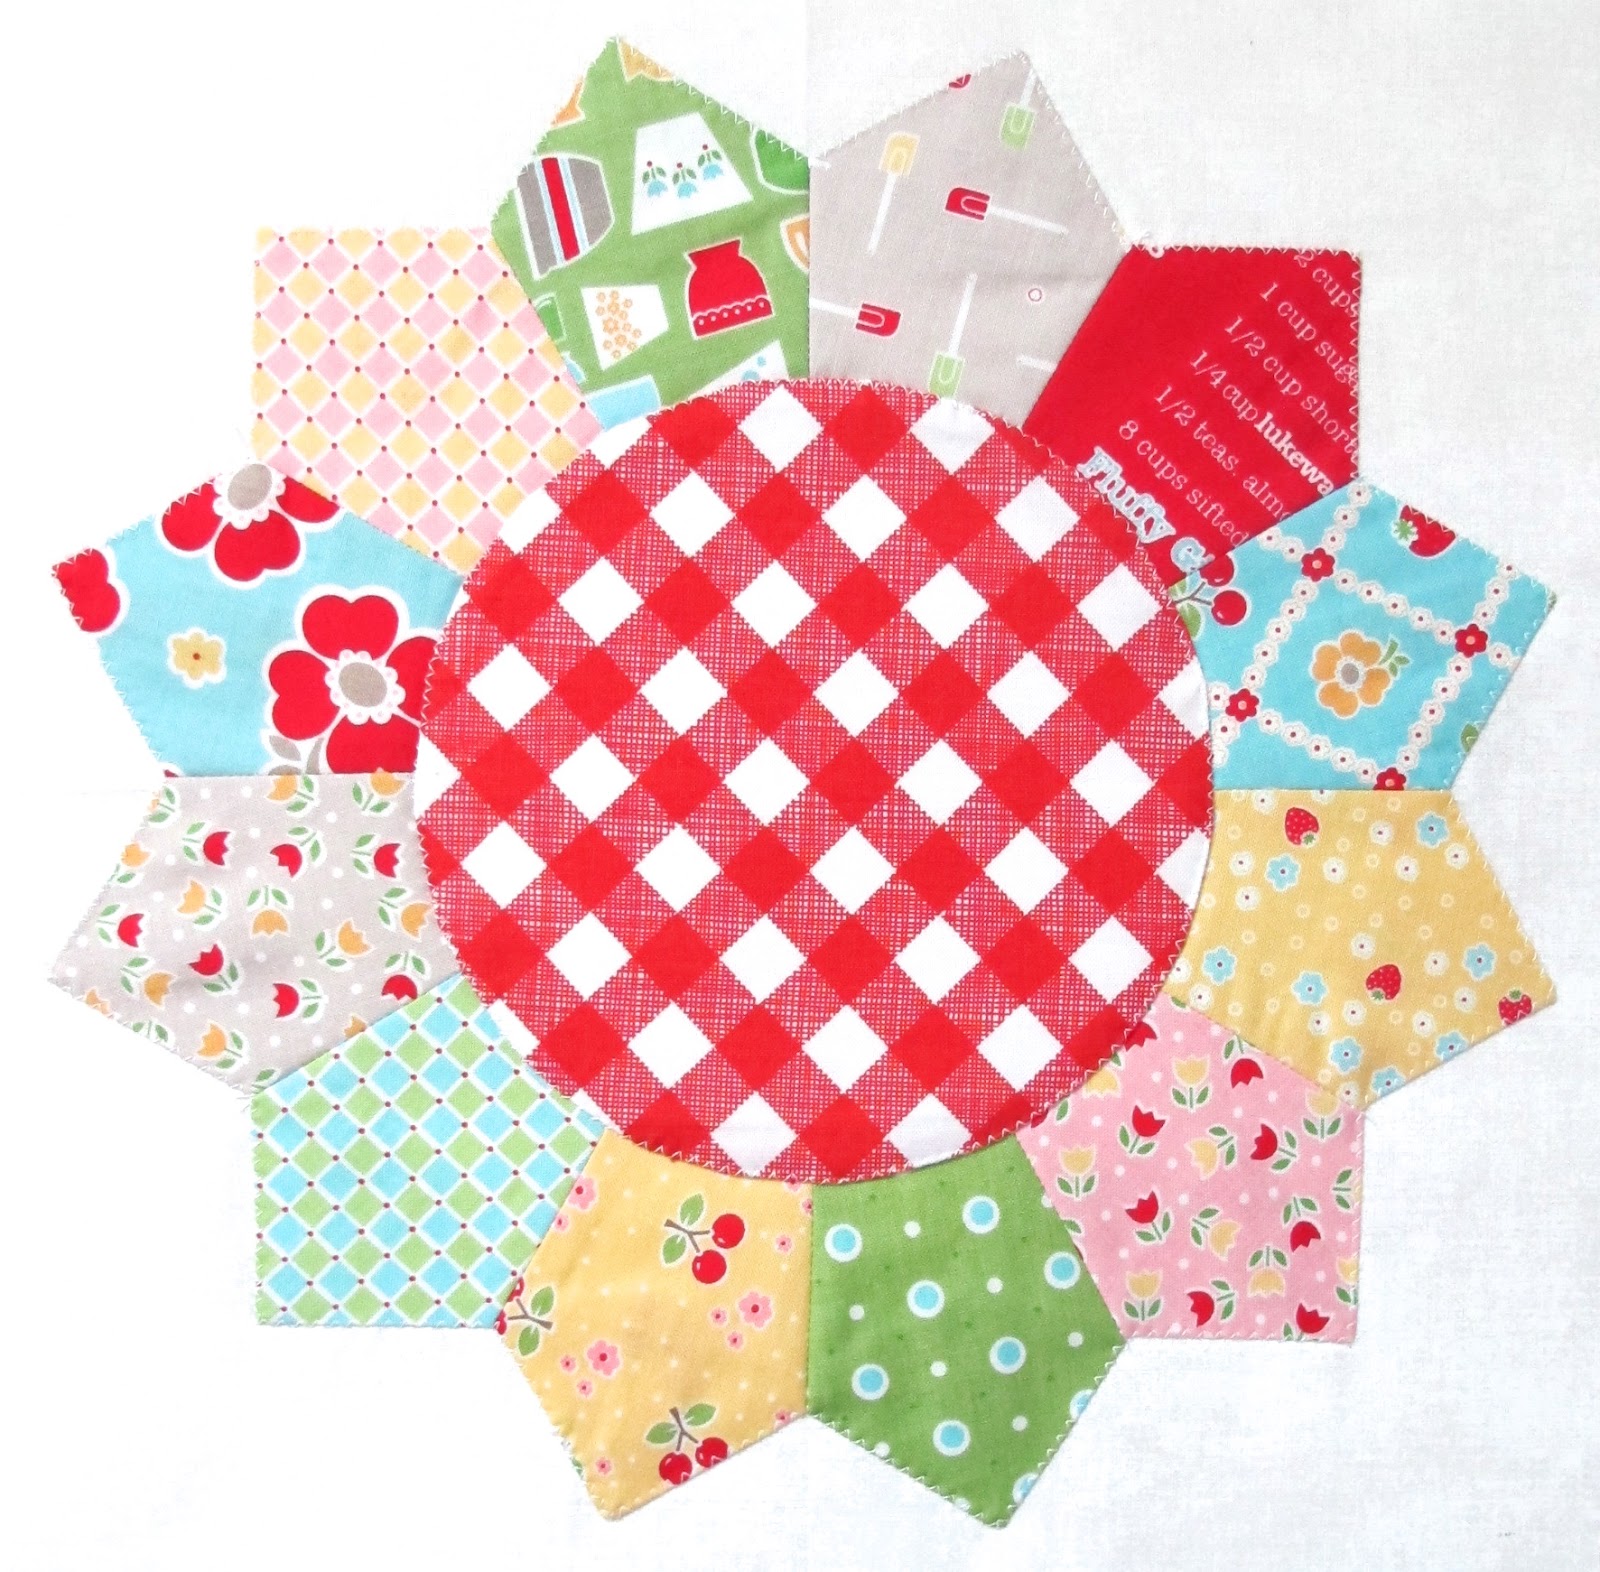
and cutting thimble shapes for dresden blocks!.
The blocks are machine appliquéd ...
and only have
12 blades per dresden so that
they are really fast to make.

I used the small size Bee in my Bonnet
to cut the blades.
When I designed these rulers a few years back…
I drew them not only to be a thimble shape…
but I also drew them on an specific angle so that
when 12 of them were sewn together
they would form a perfect circle!!!
YaY!

I cut the blades for this dresden block 3 1/2" tall…
so that it would fit onto a 12" background square.
I cut 3 1/2" x WOF strips and simply lined up the
bottom edge of the ruler with the bottom edge of
of the fabric strip each and every time that I cut.
I also folded the strip in half so that I cut 2 at a time:)

I flipped the ruler over each time I cut so that
the only fabric that was wasted
was just a little on each end of the strip:)
You can cut twelve to fourteen 3 1/2" tall
thimbles from one 3 1/2" x WOF strip.

I also used 7" squares to cut some of the thimbles.
You can get 4 - 3 1/2" tall thimbles from one 7" square.

Just cut the square in half so that you have
two 3 1/2" x 7" strips...

Layer them for cutting 2 at a time.
And again…
line the Thimble Ruler bottom edge up with the
bottom edge of fabric.
Cut on both sides of the ruler...

Flip the ruler over and cut again…
easy peasy!

After all of your cutting is complete…
Choose 12 thimbles to use for
the dresden blades for one block.

If you have never sewn a dresden block before you
will be surprised at how easy they are.
The first step is to fold the blade with
right sides together and line up
the top edges like this.

Then sew across the top with a 1/4" seam allowance.
I like to secure this seam with a backstitch or
two at the beginning and the ending.

I also like to chain piece all
12 of the dresden blades in the block.

Not only is it speedy...but it saves thread as well:)

I cut them apart and flip the top of each one right side out
by splitting the seam apart and
placing my finger at the very end of the seam...

so that it looks like this inside…
making sure that the seam is open.

When you turn it…it automatically forms a point like this!
YaY!
The tip will need a little help to get a nice point...

and so I use the rounded end of a small
crochet hook to GENTLY push out the point…
making sure the seam remains open.

I give it a good press making sure that
the seam goes down the center of the blade.

I turn it over and give it a quick press
on this side too so that it is nice and flat.
*NOTE…remember to PRESS instead of IRON.
there is a difference!!!
If you move the iron back and forth on the blade…
you can easily distort it:)

Turn and press all 12 blades like this.

Grab a larger design board and lay them out
in the order that you want them…like this.

Take a quick picture on your cell phone for easy reference
between sewing and pressing so that you can
lay them back out in the same order if you forget:)

Sew two blades together starting at the top edge
and using a 1/4" seam allowance.
I also do a backstitch or two at the
beginning and ending of this seam to secure it.

Press the seams open so they will lie nice and flat.

Lay them back out…
using your photo if needed:)

Now sew two sets together 3 times like this…

Sew the last 3 seams until you have formed the dresden!

Don't forget to press the seams open at each step.
P.S. Now you can delete the pic on your iPhone:)

Set your dresden aside and grab the
that fits a 7" square.
Cut a 7" square of fabric to use for the center circle of the dresden...

Also cut a 7" square of light to medium weight SEW IN interfacing.
This means NON-FUSIBLE.
I use Pellon brand!
You can find it in any fabric store
and you can also get a 3 yard package
by clicking here:)
Place the circle ruler in the center of
the interfacing square and trace around it …
using a mechanical pencil for a thin line:)

Pin it to the right side of your 7" square of fabric…
(I used Sew Cherry Red Gingham)

And stitch directly onto your marked lines…
all the way around…
backstitching when you begin and end.

Trim off the excess approximately
1/4" past your stitching line like this.

Use your seam ripper and carefully cut
a slit about 3" long
(in the center of the interfacing only)
to create an opening.

Turn right side out and
pinch or "roll" around the edges
between your fingers like this...

for a nice circle shape.
Give it a good press on the front so it lies flat
and has a good crease on the edges.

This is what the back looks like…
a fast and easy circle all ready for some machine appliqué!

I like to fold my circle in half and then in half again…
and press about a 1" long crease in from the edges.
I use these creases to make sure that my circle is centered
when I pin it onto my dresden.
Set your circle aside for a minute.

Cut your background fabric 12 1/2" square …
fold exactly in half and press.
Fold in half again and press.
(I used "snow" from the Riley Blake Shades collection)

Place your dresden onto your background square and
line up all 4 of the creases with a dresden seam…
(not a point, but a seam)

and pin into place.

Your dresden should be perfectly centered onto
the background by using the pressed creases as a guide.
YaY!

Now pin the circle exactly in the center…
using the creases as your guide once again.

You are ready to machine appliqué!
I first appliqué my dresden onto the
background and then the circle onto the center last.

I used white thread for this block
(Aurifil 2024 50wt.100% cotton)
and a small zig-zag stitch.
I set the stitch width and length
on my Bernina on about 1.5 or 2.0.
Use a piece of scrap fabric when setting the size
on your machine and then write down what you did
so that you can remember for the next block:)

I try to start in the middle of a blade
where the backstitching
will be the least noticable.

I keep all of my pins in until the entire block is complete
to prevent any shifting during the appliqué.

I remove the pins and give it a good press on the back.
I don't find that pressing the front is necessary at this point:)
And there you have it…
a fast and easy dresden block!

I'll need 24 more dresden blocks to complete my quilt.
I'm doing 5 rows of 5 so that it will be a square
quilt to use on the farm table in my kitchen.
I'll show you when it's pieced…
quilted…
and on the table!
xx
Lori

P.S. I forgot to tell you that my Bake Sale pre cuts
(as well as my other fabric collections)
are also available in 3 1/2" rolls as well as 7" squares!

23 comments:
Thank you.!!! Nice tutorial !!!
Super cute!!
Lori - I have yet to find someone that can write such an exact and wonderful Tutorial as you can. I'm still so new at all of these wonderful 'blocks' and though I've tried a small dresden as a label on the back of my first (real) quilt this summer - I now see what I did wrong after reading your tutorial.You have a real gift - thanks for sharing it!
I also can't get enough of your Bake Sale Fabric and keep buying more.
Fabulous tutorial Lori! And what an adorable table topper that is going to be in your darling kitchen!!! :o)
This looks like something I would like to try. Thank you so much for sharing your expertise :-)
Wonderful tut. Thanks and Happy Thanksgiving to you and yours.
Beautiful Lori.
Great tutorial. Thank you for shareing it with us
Such a great block - Dresdens are a classic, and this is a sweet update! I've also been busy sewing with the Bake Sale prints,and they are making me sew happy!
Thank you Lori for this tutorial. Your rulers are on my Christmas wishlist. I am so hoping the kids get them for me.
I have never made a dresden because I thought they looked to hard to make. Thank you for the tutorial, I can do this!!!
Shawn
I love these! I just finished an Xmas Dresden and have two more in the works. Now do I need to make another one with Bake Sale?! Stop showing us cute ideas. LOL.
Too Cute!!!
So stinkin cute!! Where can I get those Bake Sale precuts? Everywhere I've looked is sold out. Same ing with Millie's Closet!
Love it. Your tutorials are so simplistic that even the quilty challenged can accomplish something! Thank you so much for sharing your knowledge!!
Just love your tutorials. Thank you so much. I never really cared for the Dresden plate until I saw yours! Still kicking myself for just buying some 1/2 yard cuts of Bake Sale and not going for the fat quarter bundle. You're a wonderful inspiration! Thanks again.
Where can I buy more Bake Sale fabric? I have tried Heart and Home and Fat Quarter. Do you sell it directly? Thanks! You are so talented!!!
Super adorable! Lover the rulers and can't wait to give this a try!
So cute! I love that Dresden plate with the big center and shorter petals. You never cease to amaze me with your talents. Makes my day!
I am relatively new to your blog. I love this block. And you make it look so easy! Thank you.
Wow, beautiful!! I have to try this out!
Thanks Lori: Great tutorial. Now I want to make one too.
I love, love, love your little yellow Hoosier child's cabinet or salesman's sample cabinet! I have one too, and it's my treasure!! Love our blog!
Post a Comment