Monday, March 28, 2016

BLOOM Sew Along - Week Eleven - Block Eleven!!

Good morning cute people!
It's time to 
BLOOM

We are really making good progress on our quilt and all of you should be getting pretty darn fast in preparing your blocks for appliqué:)
I love seeing everyones blocks on 

It makes me so happy!!!


That being said...
it's never too late to start.
to get your templates 
so you can have fun with us too!


Today we will be blooming block eleven:)


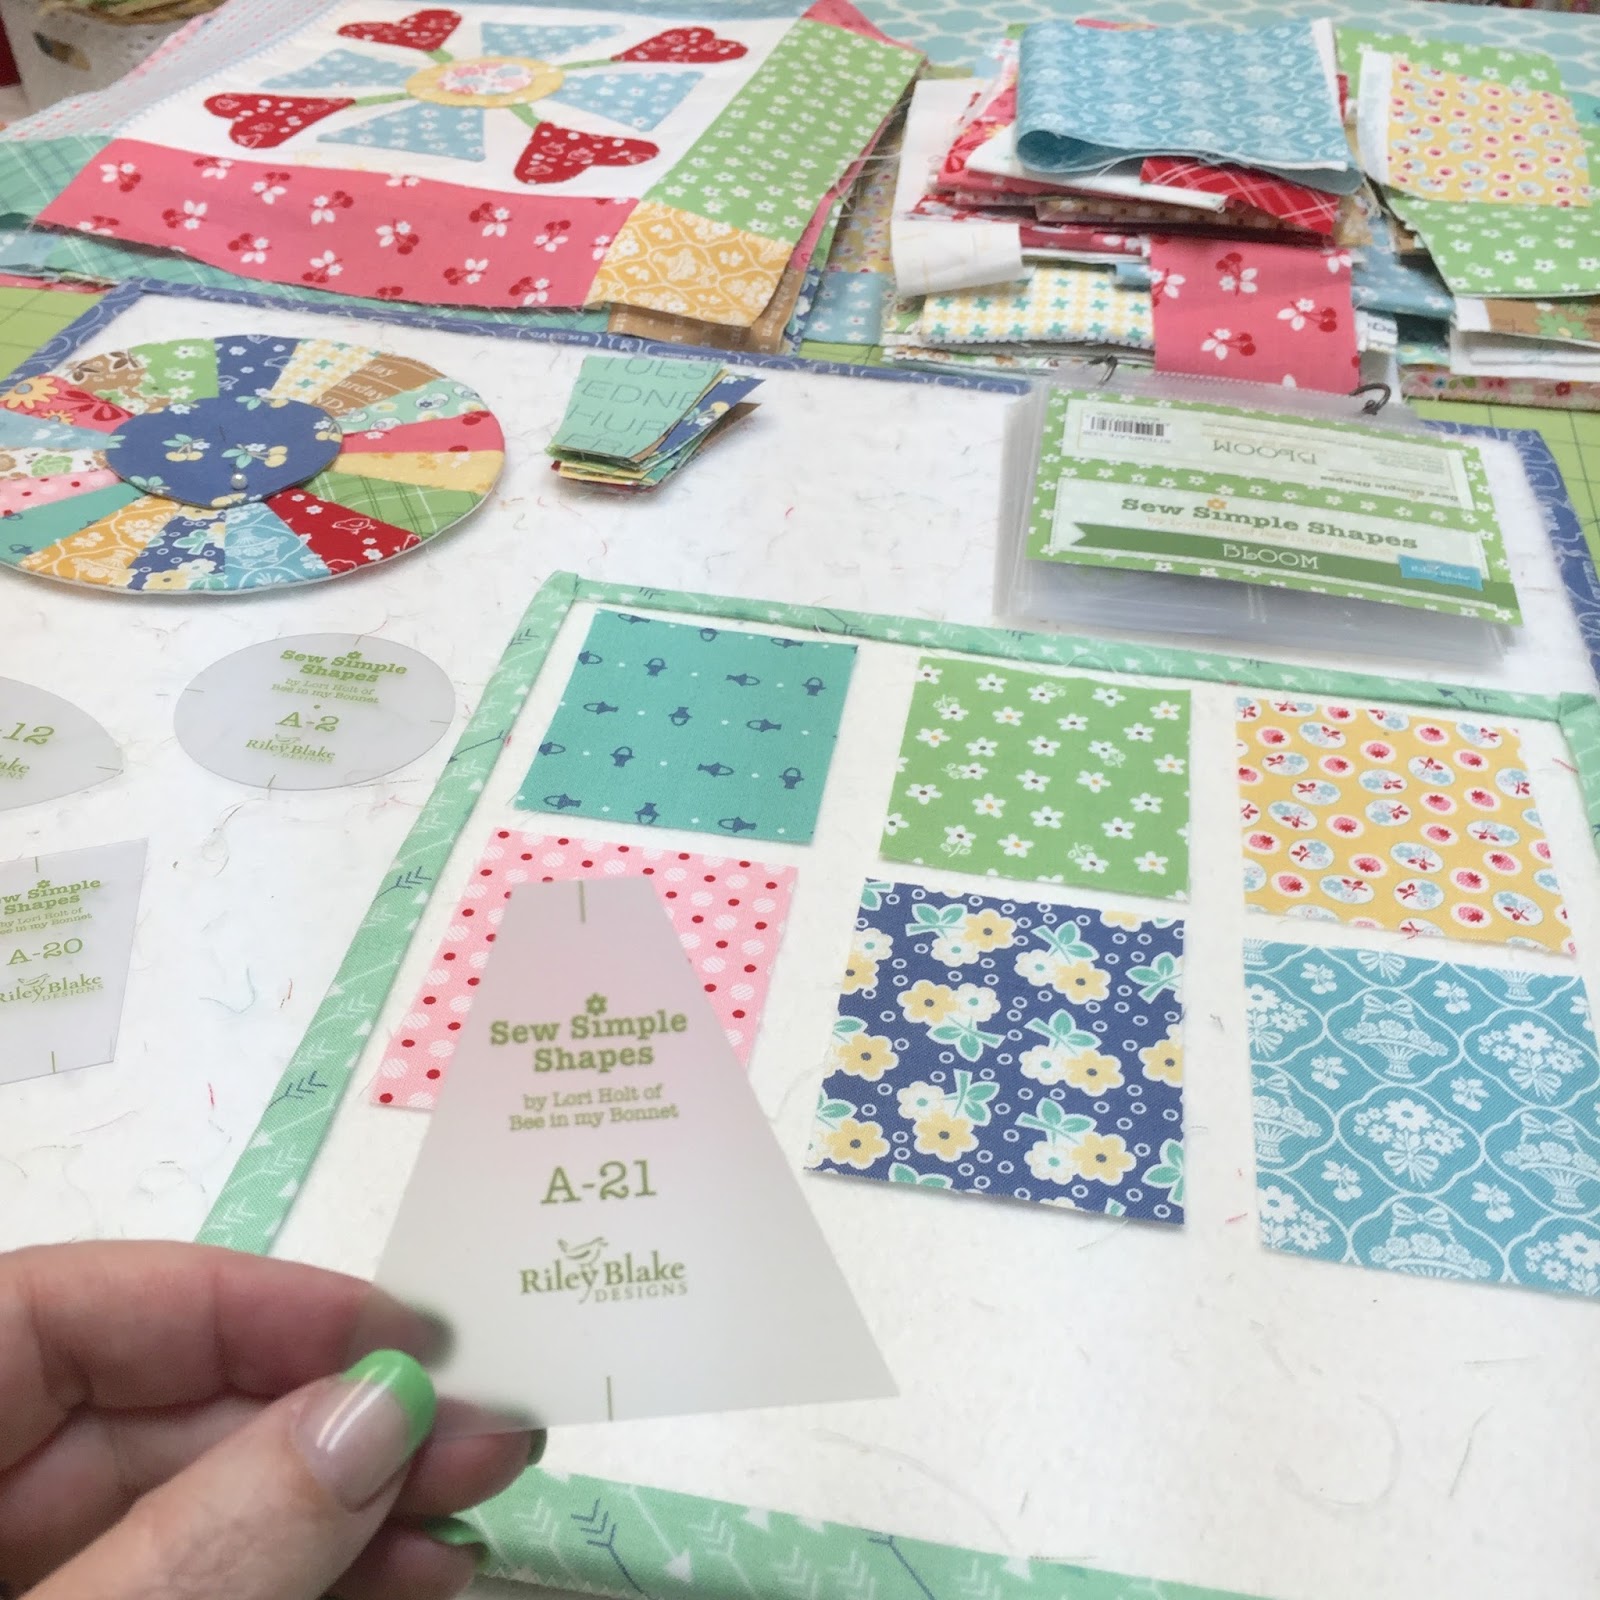
These are my fabrics this week for the appliqués.
We will be using
A-12 and A-24
Sew Simple Shapes


From both fabric and Pellon:
Cut 1 - 4" x 5" for tulip
Cut 2 - 2 1/2" x 4 1/2" for leaves

From fabric only:
Cut a 9" square for background 
and prepare a 5" long stem.

1. Trace around the shapes onto Pellon.
2. Place Pellon onto fabric, sew on traced line and trim.
3. Cut an "X" into Pellon only for turning.
4. Turn, shape using the Clover turning tool and press.


Cut the two "cleavage" on the tulip top so that it will lie flat when turning.
Be careful not to cut into your sewing.


Press your background fabric in half like this.


Glue or pin baste your stem and tulip down the center line.


Place the center of the tulip 1 1/4" down
 from the top edge of your background.


And your leaves 1 1/4" from the side edge as well.


I think that these leaves look cute overlapping the stem center:)
Now that your block is basted...
it's time to appliqué!


When you are finished...trim your block to 8 1/2" square
 and cut your border strips and squares.


Sew your block together and take a cute photo.
Post it on 
 so we can all admire it!

Please use the hashtag
#BloomBlockEleven

Thank you from the bottom of my heart 
for participating in my BLOOM Sew Along...
we are halfway through it and
 I am having so much fun sewing with you!
xx
Lori


Saturday, March 26, 2016

COZY CHRISTMAS Sew Simple Shapes are HERE!!


I'm so excited to announce 
that my new set of 
Sew Simple Shapes
have arrived at the warehouse!

This set is called 


The same name as my latest fabric collection that will arrive in May.


Of course there will be a sew along for this 
Cozy Christmas quilt!!! 

The pattern will be a free download 
just like the BLOOM quilt pattern is for the sew along thats happening now:)


We will be using my Cozy Christmas fabric...
this is a close up of the main background print in the quilt.:)


I'm excited about these new shapes ...
they will be a fun addition to the
 BLOOM set as well:)


The sew along starts
 Monday, August 15th and you are invited!

 We will be doing one block a week 
and there are 12 blocks.
You will have plenty of time to
 get your quilt
 appliquéd,
pieced, quilted and bound
 for you to enjoy this Christmas season:)

How about it...are you in?
I'm excited to sew my
 Cozy Christmas Quilt with you:)
xx
Lori


Monday, March 21, 2016

BLOOM Sew Along - Week Ten - Block Ten!!!


Today is week ten in the 
BLOOM Sew Along


That means we are halfway finished with the blocks....
YaY!

If you are just joining us...
to download the free pattern


to purchase the 
BLOOM
Sew Simple Shapes
then simply 
to see the first week and get started!


Now onto block ten for the rest of us:)


Here are the fabrics that I chose for this week.
For this week we are using
 A-1   A-21   A-22
Sew Simple Shapes


Cutting for block ten is as follows:
From both fabric and Pellon -
Cut 1 - 2" square for flower center
Cut 2 - 3" squares for leaves
Cut 1 - 5" square for flower

From fabric only -
Cut a 9" square for the background and prepare a 5" long stem.

1. Trace shapes onto the Pellon.
2. Sew on traced lines with pellon on right side of fabric.
3. After trimming... cut an "X" in pellon only for turning.
4. Turn...shape using the clover tool and press.


Take note that on the flower 
you will need to 
clip each "cleavage" right up to
 but not into your sewing.


Press your background in half like this.


Glue or pin baste your stem down
 the center fold and even with the bottom.


Place the cleavage of your flower 
on the center fold 
and 1 1/4" down from
 the top edge of fabric:)


The center circle is placed
 1" in from each cleavage on the flower.


The leaves go right next to the stem...
make sure they line up on both sides.

Now it's time to 
appliqué in your chosen method!


After appliqué is complete...
trim your block to measure 8 1/2" square.
Cut your border strips and squares.


And sew your block ten!
Take a photo and put it on 
using the hashtag
#BloomBlockTen


A few days ago I did a tutorial 
showing you 
something else you could 
make with my A-21 template...


A cute little dresden!
to see the tutorial.


I'm having fun with these shapes and 
I love showing you a lot of 
different ways to use them...
I hope you are 
experimenting with them as well!

Until next week...
"BLOOM" 
Where you're Planted:)
xx
Lori

Saturday, March 19, 2016

Dresden with Points Tutorial using Sew Simple Shapes


Today I'm going to show you how to make another cute little dresden.
This one has points and finishes at 4 1/2".


I love showing you different ways to use my


For this dresden I'm using
 A-21  Sew Simple Shape 
and cutting a piece 2 1/2" x 3" for each dresden blade.
You will need 8 blades for one dresden.
(I know I am only showing 6...but trust me...you will need 8)


A-21 is 2 1/2" tall 
so place it on the fabric like this...


And trace a line on each side of the shape.


Now place your ruler on the line and cut...


Like this.
Set it aside and cut the rest.


If your fabric is too dark to sew the line...trace on the wrong side:)


Now that your blades are cut...
it's time to make the point!


Fold the widest part of the blade in half and line up the corners and the top edge.


Sew a 1/4" seam allowance across the top where you folded 
and do a small backstitch on each blade
 when you stop and start to secure your stitches.

I like to chain piece mine to save time and thread:)


Cut them apart.
This is what the front
 of one blade should look like at this point.


Finger press the seam open like this...


Then turn the top right side out.


Use your Clover tool to gently push that point out....
this is why I had you back stitch to secure that seam.


Now press it making sure that the seam is in the center.


Because the seams are pressed open it will easily press nice and flat.


After each blade is turned and pressed...
lay then out in a circle.
Ha!
This is where I realized I had only done six.
Whoops!


I quickly made 2 more to complete the circle:)


Sew them together in pairs using a 1/4" seam allowance.
These are short pieces so I used a trailers awl to
 keep the seams flat and accurate as they got to the needle.

I always use an open toe foot when piecing
 so that I can see exactly where my needle goes into my fabric.


I chain pieced these too...
and notice that when I clipped them apart...
 I left a "thread tail" on the top of the dresden blade pairs.
That is so that when I appliqué 
(either by hand or machine)
I can tuck those tails under to ensure that
 the top of that seam will not come apart:)


Press your seams open:)


Sew the pairs together
and then sew the two sides together.


And now you have a super cute little dresden with points!


Here's the back:)


And now for the center circle.
I used my A-1 shape and
 cut a pice of fabric and sew in Pellon 2" square.
I traced the circle onto the Pellon...


Sewed on the line...
trimmed off the excess and 
cut an "X" in the Pelloon for turning right side out.


I shaped my little circle and pressed it.


I'll appliqué it directly onto the center:)


So many things can be done with these dresden...
but of course I always love making flowers:)
There are plenty of leaf options within the 
BLOOM set of Sew Simple Shapes...
be creative!


The 6" round dresden uses the A-20 shape
 and I did that tutorial last week.
to see it again:)

I hope that you have fun making these cute little dresdens...
chat with you on Monday
for week 10 of the 
BLOOM Sew Along:)
xx
Lori


Related Posts with Thumbnails